Affiliate links on Android Authority may earn us a commission. Learn more.
How to use a web API from your Android app
Published onJune 20, 2015

There are two major methods for retrieving data from most web services, XML or JSON. XML stand for eXtensible Markup Language, and its syntax somewhat resembles HTML (Hyper Text Markup Language), in that they are both markup languages. Sample XML representation of a human can be
<human>
<sex>Male</sex>
<age>27</age>
<occupation>Software Developer</occupation>
</human>
or
<human sex="Male", age="27", occupation="Software Developer" />JSON stands for JavaScript Object Notation, which is a nod to the fact that it is a syntax that was developed for the Javascript language, as a means of parsing Objects between programs. JSON has a comparatively standardized syntax, compared to XML, and the above XML human can be represented in JSON as
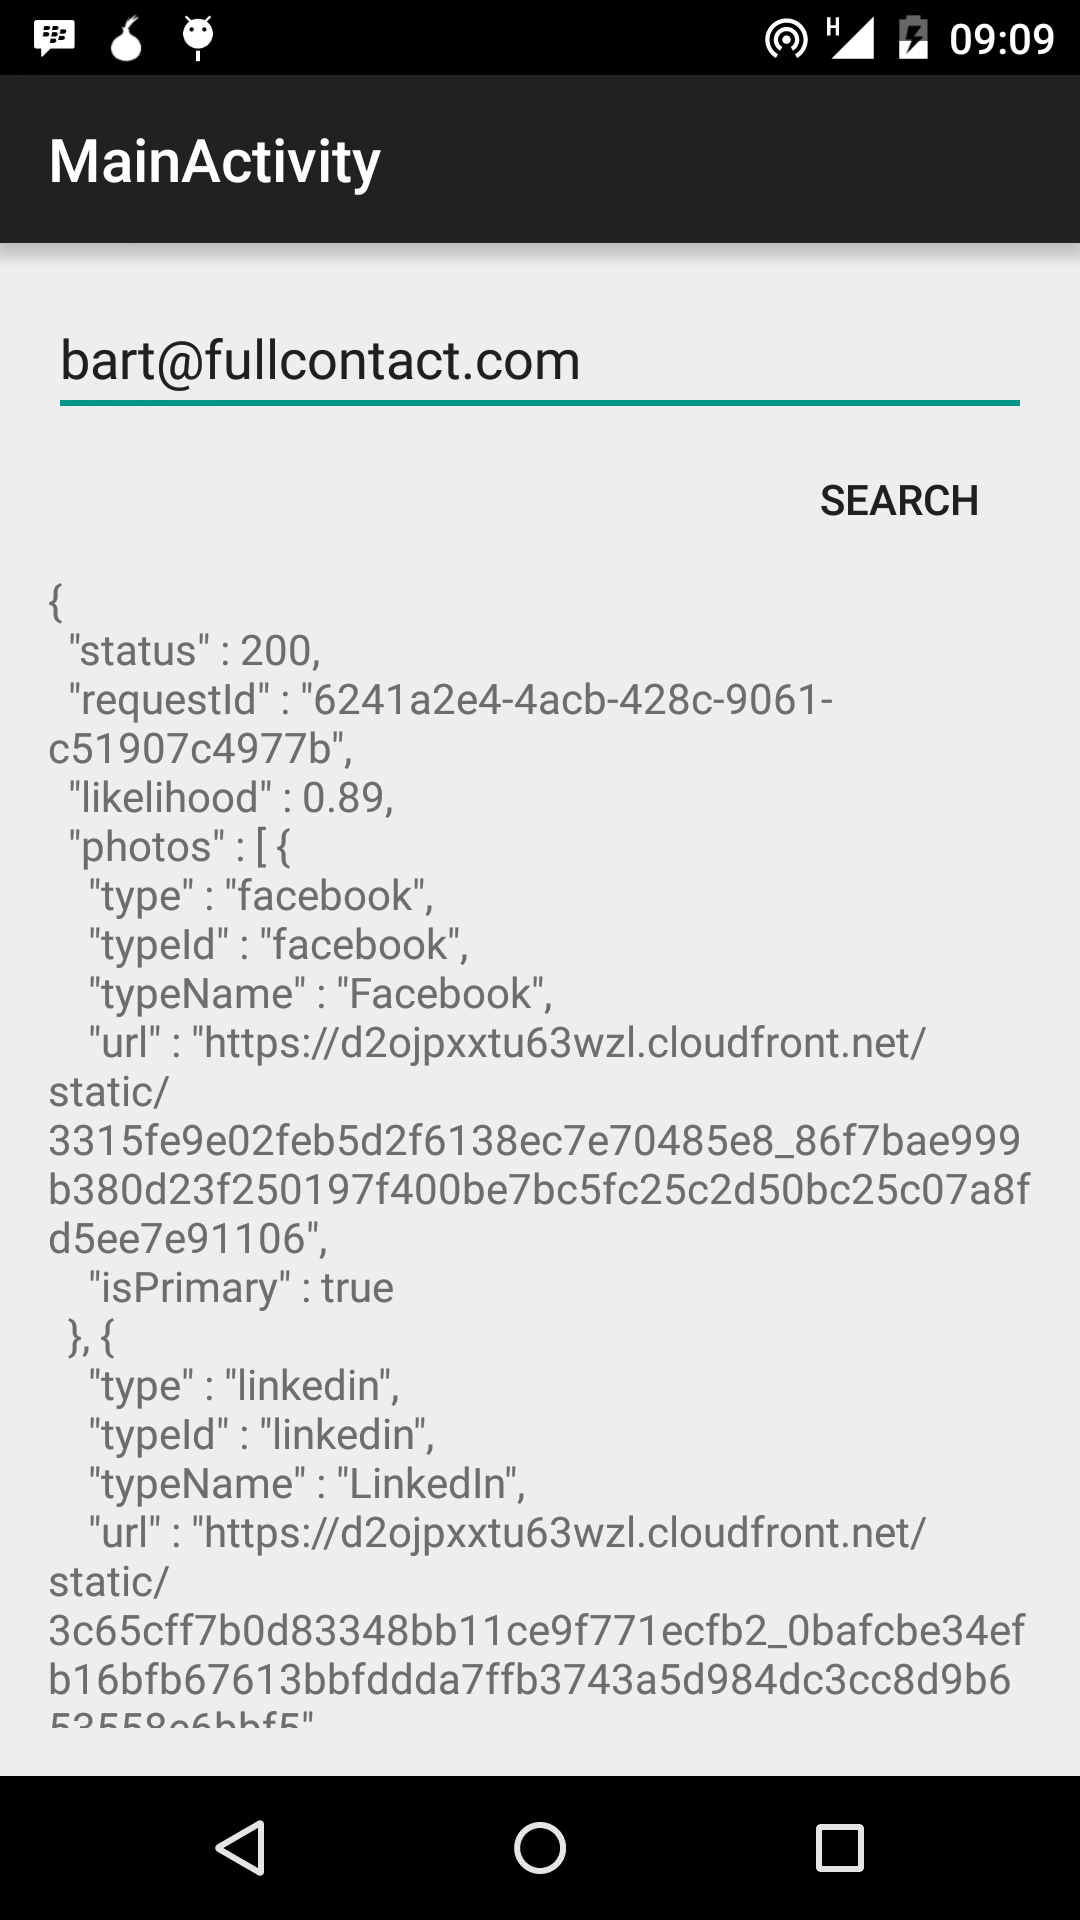
{human: {sex:"Male", age:"27", occupation:"Software Developer"}}For this article/tutorial, we have elected to fetch data from a web service in JSON format. For simplicity sake, our app will be a simple one activity app, with a single EditText for input, a Button to initiate the web request, and a TextView to display the response.
First things first, we have to find an adequate web API from which to fetch data. After a fair bit of hunting, we settled on FullContact Person API. This is an excellent and interesting API. It takes a person’s email address, and then returns information about the person from over 120 different social networks, including facebook, twitter and linkedin. The returned information format can either be in XML or JSON. Like most API’s, you would need an API key, which must be specified with every API query. As at the time of writing, you can easily register as a developer for a free quota (trial), with a limit of 250 queries monthly. Before we begin, visit the Full Contact Developer page and get your API key.

Get an API key
While some web APIs do not require an API key, you would be hard pressed to find one that provides any useful/interesting service and doesn’t require an API key. The API key should be thought of as your unique identifier to the API provider.
For your fullcontact API key, visit the developer site and register, and you should get an email that contains your key. Ensure that you keep your API key private, to prevent others from using your key and exceeding your quota.
AndroidManifest.xml
Our application requires internet access, so we must request for the INTERNET permission in the AndroidManifest.xml file. Note that the permissions request comes before the application tags.
<?xml version="1.0" encoding="utf-8"?>
<manifest xmlns:android="http://schemas.android.com/apk/res/android"
    package="com.sample.foo.simplewebapi" >

    <uses-permission android:name="android.permission.INTERNET"/>

    <application
        android:allowBackup="true"
        android:icon="@mipmap/ic_launcher"
        android:label="@string/app_name"
        android:theme="@style/AppTheme" >

        <activity
            android:name=".MainActivity"
            android:label="@string/title_activity_main" >
            <intent-filter>
                <action android:name="android.intent.action.MAIN" />

                <category android:name="android.intent.category.LAUNCHER" />
            </intent-filter>
        </activity>
    </application>

</manifest>
Activity Layout
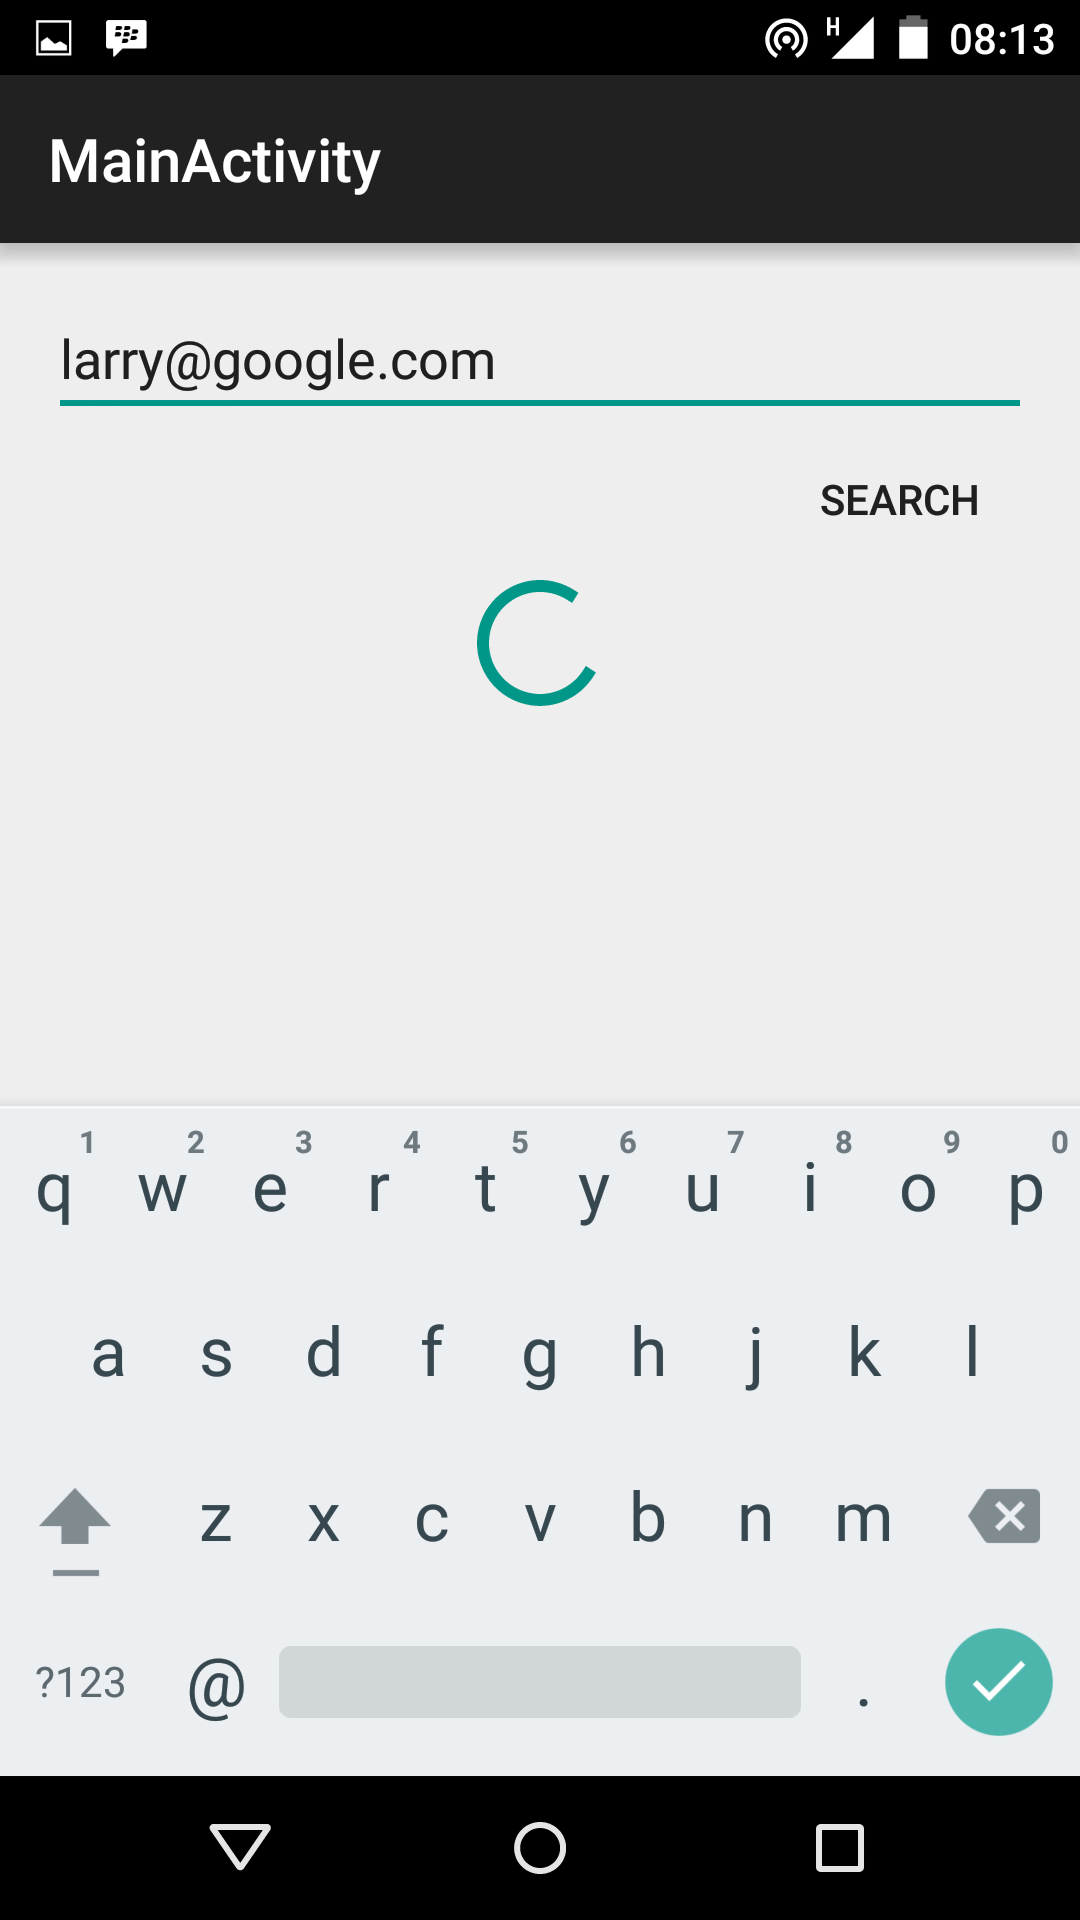
We implement a very simple layout. There’s an EditText, where the person’s email address is input, and a Button to send the API query. Beneath these, we have a TextView (wrapped in a ScrollView) which would display the received JSON string, and a ProgressBar that’s initially set to be invisible using android:visibility=”gone”. The progressBar becomes visible when the “Search” Button is clicked, and disappears again when the data is about to be displayed.
<LinearLayout xmlns:android="http://schemas.android.com/apk/res/android"
    xmlns:tools="http://schemas.android.com/tools"
    android:layout_width="match_parent"
    android:layout_height="match_parent"
    android:orientation="vertical"
    android:paddingLeft="@dimen/activity_horizontal_margin"
    android:paddingRight="@dimen/activity_horizontal_margin"
    android:paddingTop="@dimen/activity_vertical_margin"
    android:paddingBottom="@dimen/activity_vertical_margin"
    tools:context="com.sample.foo.simplewebapi.MainActivity">
    <EditText
        android:id="@+id/emailText"
        android:layout_width="match_parent"
        android:layout_height="wrap_content"
        android:inputType="textEmailAddress"
        android:hint="Enter email address"/>
    <Button
        android:id="@+id/queryButton"
        android:layout_width="wrap_content"
        android:layout_height="wrap_content"
        android:layout_gravity="end"
        style="@style/Base.Widget.AppCompat.Button.Borderless"
        android:text="Search"/>
    <RelativeLayout
        android:layout_width="match_parent"
        android:layout_height="match_parent"
        android:gravity="center">
        <ProgressBar
            android:id="@+id/progressBar"
            android:layout_width="wrap_content"
            android:layout_height="wrap_content"
            android:indeterminate="true"
            android:layout_centerHorizontal="true"
            android:visibility="gone" />
        <ScrollView
            android:layout_width="match_parent"
            android:layout_height="match_parent">
            <TextView
                android:id="@+id/responseView"
                android:layout_width="wrap_content"
                android:layout_height="wrap_content" />
        </ScrollView>
    </RelativeLayout>
</LinearLayout>
MainActivity
Before we jump into the code, there’s a very important point to note. Prior to Ice Cream Sandwich, Android apps could open a network connection, and request network resources from the main UI thread. This led to such situations where the application would be completely unresponsive while waiting for a response. Now, with stricter rules regarding performing potentially expensive operations on the UI thread, network operations must be performed on another thread. Luckily, there is a class just for this, called AsyncTask. From the Android documentation, AsyncTask facilitates the proper and easy use of the UI thread, by allowing the performance of background operations, and publishing the results on the UI thread without the need for manipulating threads and handlers. In simple words, AsyncTask handles all the complexity for you.
To make use of the AsyncTask features, you must subclass it, and provide 3 generic types, called Params, Progress and Result. Params refers to the parameters that would be parsed to your Task, Progress refers to the progress indicator/counter type, and Result is what would be returned on completion of the task. AsyncTask has 4 important methods, onPreExecute (what to do before the expensive task begins), doInBackground (the actual expensive operation goes in here), onProgressUpdate (what to do to show progress), and onPostExecute (what to do when the task is complete).
class RetrieveFeedTask extends AsyncTask<Void, Void, String> {

        private Exception exception;

        protected void onPreExecute() {
            progressBar.setVisibility(View.VISIBLE);
            responseView.setText("");
        }

        protected String doInBackground(Void... urls) {
            String email = emailText.getText().toString();
            // Do some validation here

            try {
                URL url = new URL(API_URL + "email=" + email + "&apiKey=" + API_KEY);
                HttpURLConnection urlConnection = (HttpURLConnection) url.openConnection();
                try {
                    BufferedReader bufferedReader = new BufferedReader(new InputStreamReader(urlConnection.getInputStream()));
                    StringBuilder stringBuilder = new StringBuilder();
                    String line;
                    while ((line = bufferedReader.readLine()) != null) {
                        stringBuilder.append(line).append("\n");
                    }
                    bufferedReader.close();
                    return stringBuilder.toString();
                }
                finally{
                    urlConnection.disconnect();
                }
            }
            catch(Exception e) {
                Log.e("ERROR", e.getMessage(), e);
                return null;
            }
        }

        protected void onPostExecute(String response) {
            if(response == null) {
                response = "THERE WAS AN ERROR";
            }
            progressBar.setVisibility(View.GONE);
            Log.i("INFO", response);
            responseView.setText(response);
        }
    }
From the code above, RetrieveFeedTask extends AsyncTask<Void, Void, String>, which indicates the type of Params is Void, Progress is Void and Result is String.
In onPreExecute, we set the ProgressBar to become visible, and we clear the contents of the TextView. This is done before the task begins running.
doInBackground expects Params, which is Void in this particular case. We then set up and open a HttpURLConnection to make an API request. The URL is built from the supplied email, and our API_KEY. Some web APIs support sending the API_KEY through a HTTP header to prevent snooping. This improves security, since an API key sent via the URL can be snooped even though the request is a HTTPS request. Finally, we read the complete response string, using a BufferedReader and a StringBuilder.
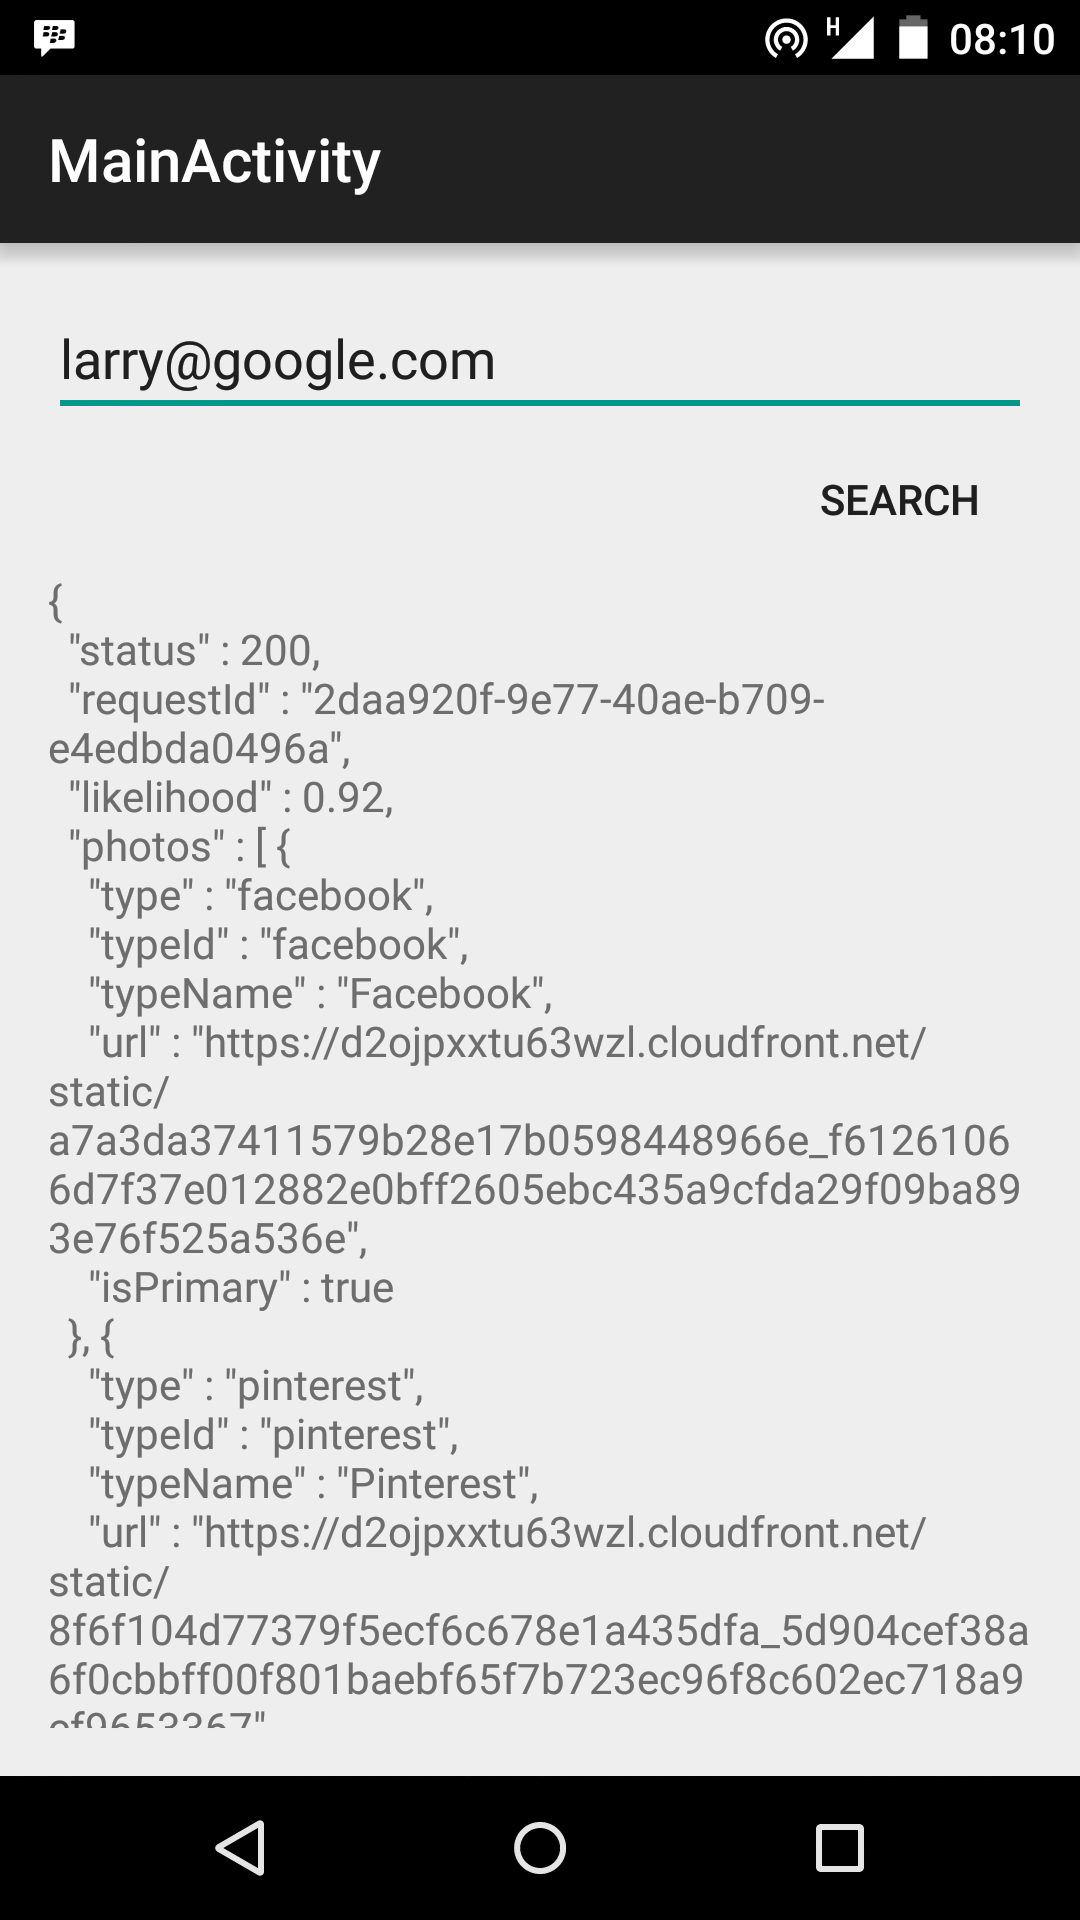
The onPostExecute method hides the ProgressBar once more, and displays the fetched response in the TextView.

Final Words
There are a ton of web APIs that provide free/trial quotas. If looking for other web APIs, two great places to begin your search include ProgrammableWeb and Mashape.
Finally, we completely ignored the fact that, to do anything useful with the returned JSON string, you will most likely need to parse the string into a Java Object. There are different libraries for manipulating and using JSON objects (E.g GSON and Jackson). However, there is the equally straightforward (and built into android) org.json package. To parse the returned string into a JSONObject can be achieved with the following code snippet.
try {
                JSONObject object = (JSONObject) new JSONTokener(response).nextValue();
                String requestID = object.getString("requestId");
                int likelihood = object.getInt("likelihood");
                JSONArray photos = object.getJSONArray("photos");
                .
                .
                .
                .
            } catch (JSONException e) {
                // Appropriate error handling code
            }
As usual, the complete code is available on github for you to do with as you please.