Affiliate links on Android Authority may earn us a commission. Learn more.
How to wrap text in Google Sheets
Published onMarch 3, 2022
Google Sheets is a very handy productivity tool that facilitates seamless spreadsheet sharing with colleagues and friends. It makes it very easy to collaborate on projects both big and small, but it can be a bit tricky at times. Not only do you often find yourself dealing with large sets of numbers, but also text. The way that it is set up by default can make it difficult to work with larger text blocks, so here’s a handy guide to teach you how to wrap text in Google Sheets.
Read more: How to double-space on Google Docs
QUICK ANSWER
To wrap text in Google Sheets, select the cells you wish to wrap text in. After that, click the Text wrapping button from the top toolbar, then click Wrap.
JUMP TO KEY SECTIONS
What does text wrapping do?
By default, text aligns to the left of the cells. It is also set to overflow into the next cell, which usually means you will not be able to read everything in each cell without clicking on it. This can be a pain, especially when you are working with a lot of text. That is where text wrapping comes in, as it allows you to control the way that the cells display extended amounts of data within each cell.
There are a few different options to choose from. If you select the wrap option as we will show you below, all of the cells will expand vertically to show all of the text (or numbers) within them. There are also some other handy formatting tools to be aware of, but first, let’s go through how to wrap text in Google Sheets.
How to wrap text in Google Sheets (desktop)
Start by selecting whichever cells that you want to activate text wrapping for. To select more than one, press and hold Ctrl on your keyboard, then click all of the cells you want to select.

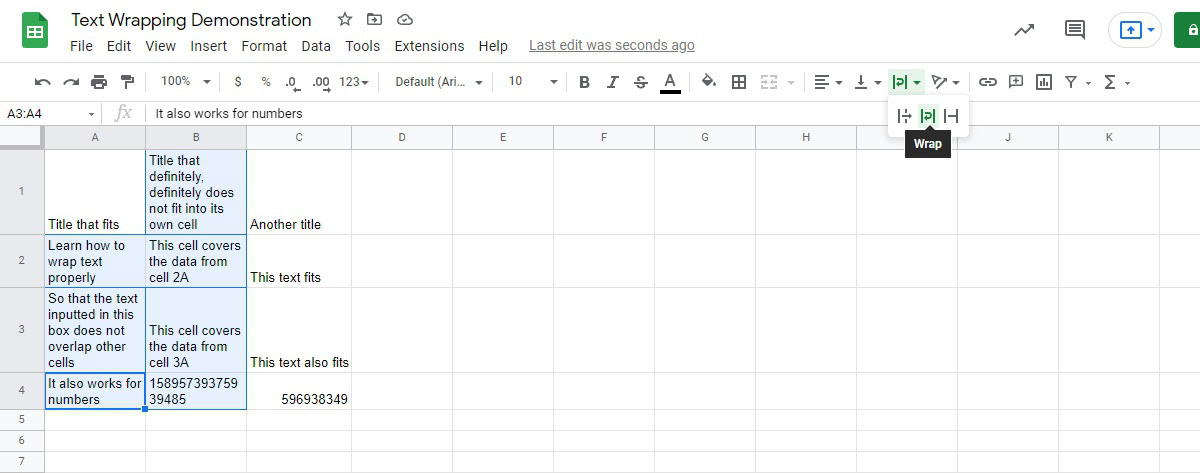
The next step can be done in two ways. The classic way is to click Format → Wrapping → Wrap. However, the text wrapping button has now been added to the toolbar menu, which makes it much easier to wrap text.
Click the Text wrapping button in the toolbar.

From the subsequent menu, click the Wrap button. This looks like an arrow curving downwards between two vertical lines.

All of the contents within the cells you selected will be formatted as “Wrap text.”
How to wrap text in Google Sheets (Android and iOS)
Open the Google Sheets mobile app on your Android or iOS device. Select whichever cells you want to wrap the text within.
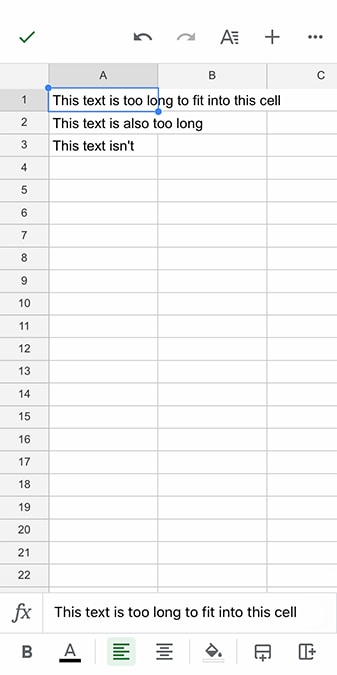
Press the Format button at the top. This looks like a capital letter ‘A’ next to four horizontal lines. Within the pop-up, tab over to Cell.
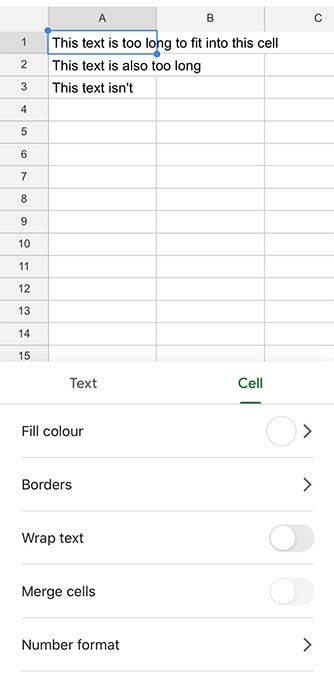
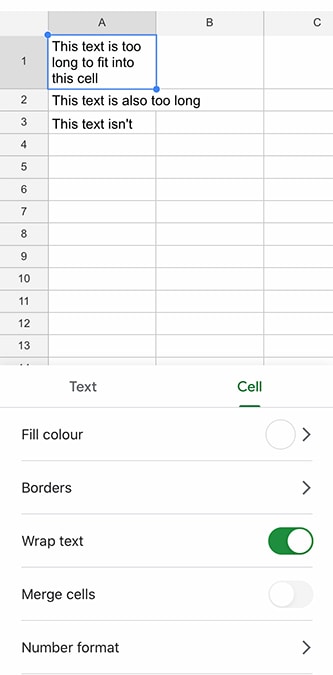
Press the slider next to Wrap text.
Other formatting options
On the mobile app, you will notice that there is only one option, which is to turn text wrapping on or off. However, on the desktop version of Google Sheets, you can select Overflow or Clip as well. These options are very similar, but the main difference is that, if you select Overflow, any cells with extensive text that do not have filled cells next to them will simply overflow into them.
Overflow is also the default setting.
When you select Clip, the text will simply be cut off by the next cell.

Wrapping all of the text at once
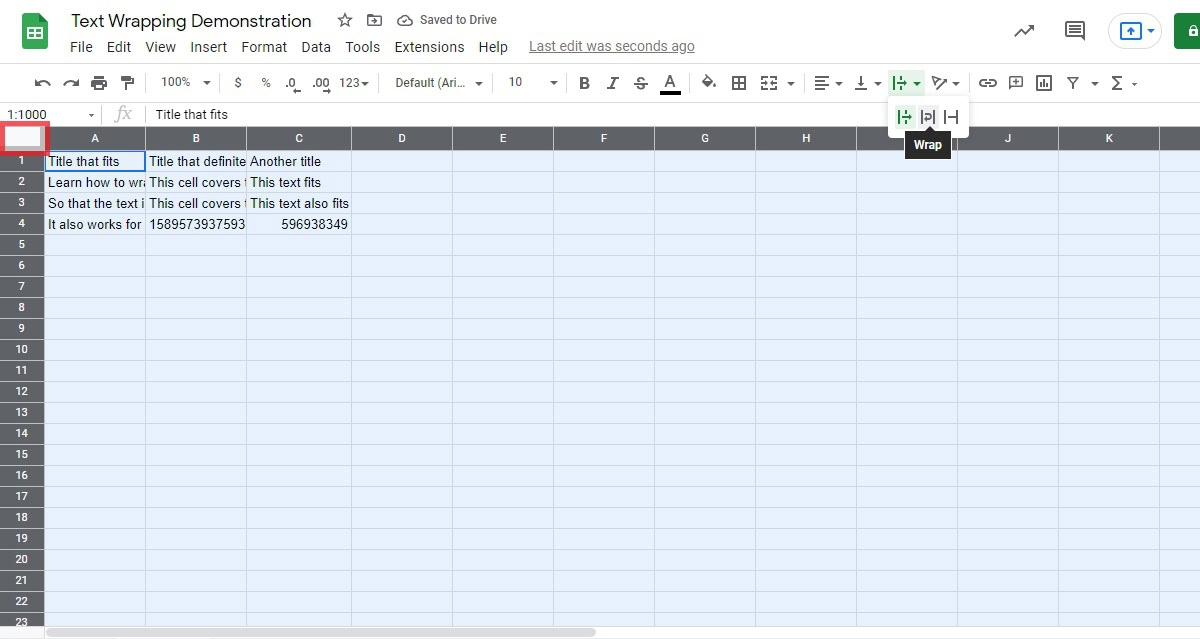
Another thing to note is that you can also apply text wrapping to the entire spreadsheet with ease.
The method is the same on both mobile and desktop versions. You simply just need to click the blank cell in the top left-hand corner. When all cells have been selected, click the Text wrapping box, and then select Wrap.
Read more: How to add a graph to Google Docs
As you can see, text wrapping in Sheets isn’t all that hard, especially after you use the feature a couple of times. Want to learn more about Google Sheets and increase your skills? We’ve got a complete guide right to basic Google Sheets formulas here.