Affiliate links on Android Authority may earn us a commission. Learn more.
How to upload a video to YouTube
Published onMarch 31, 2023
Video content is the crux of YouTube as a platform. If users couldn’t upload videos, YouTube would serve zero purpose in today’s media landscape. Since 2005, YouTube has become the second most visited site, second only to its parent company Google. Content creators have been able to pay their bills by posting popular—sometimes even iconic—videos. Let’s get you started by teaching you how to upload a video to YouTube.
THE SHORT ANSWER
To upload a YouTube video, click Create > Upload video > SELECT FILES. Locate the video file on your computer, then upload it. Review your video's Details, Video elements, Checks, and Visibility, and make changes as necessary. Click SAVE in the Visibility section to finish uploading your video.
KEY SECTIONS
Uploading a video to YouTube (desktop)
Uploading and deleting videos on YouTube are the crux of the platform. When it comes to customization and formatting, YouTube allows you to perfect your video. You can add an SEO-friendly title and description, specify your audience, set a timer for when you want your video to go live, and more.
This allows you to take ownership of your content and give it the best chance to succeed. If your video doesn’t do so well, you can always go back in and edit it.
Starting your upload
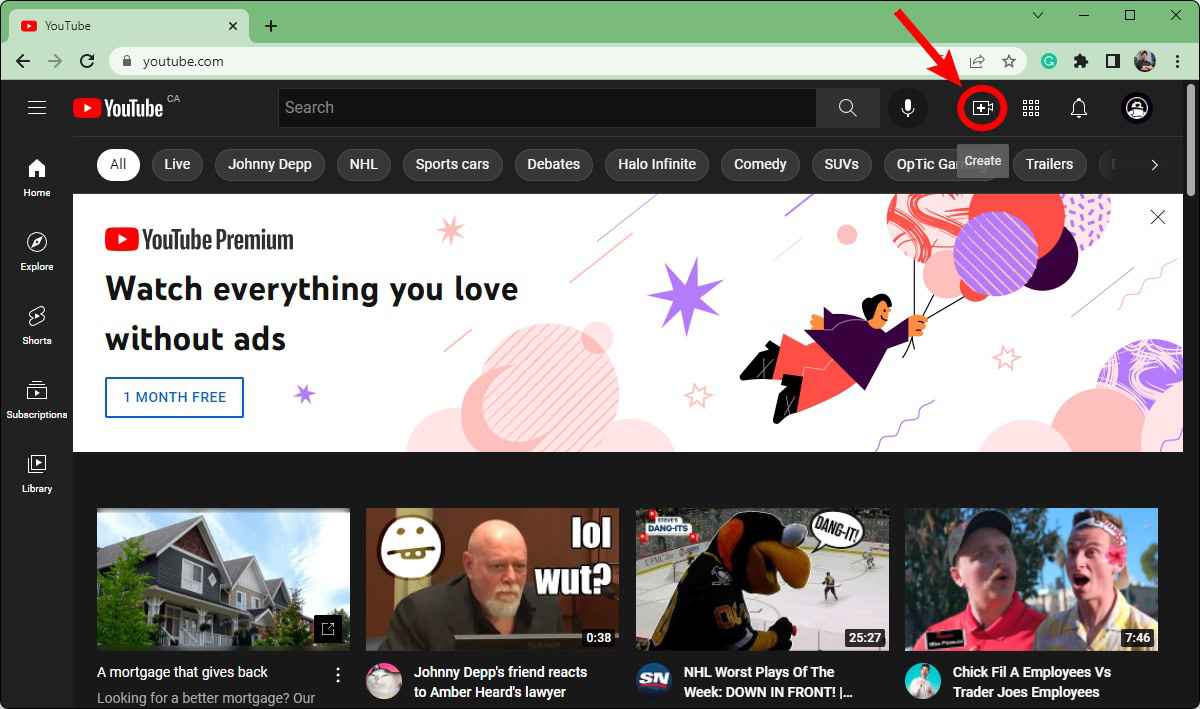
From the YouTube home screen, click the Create button at the top.
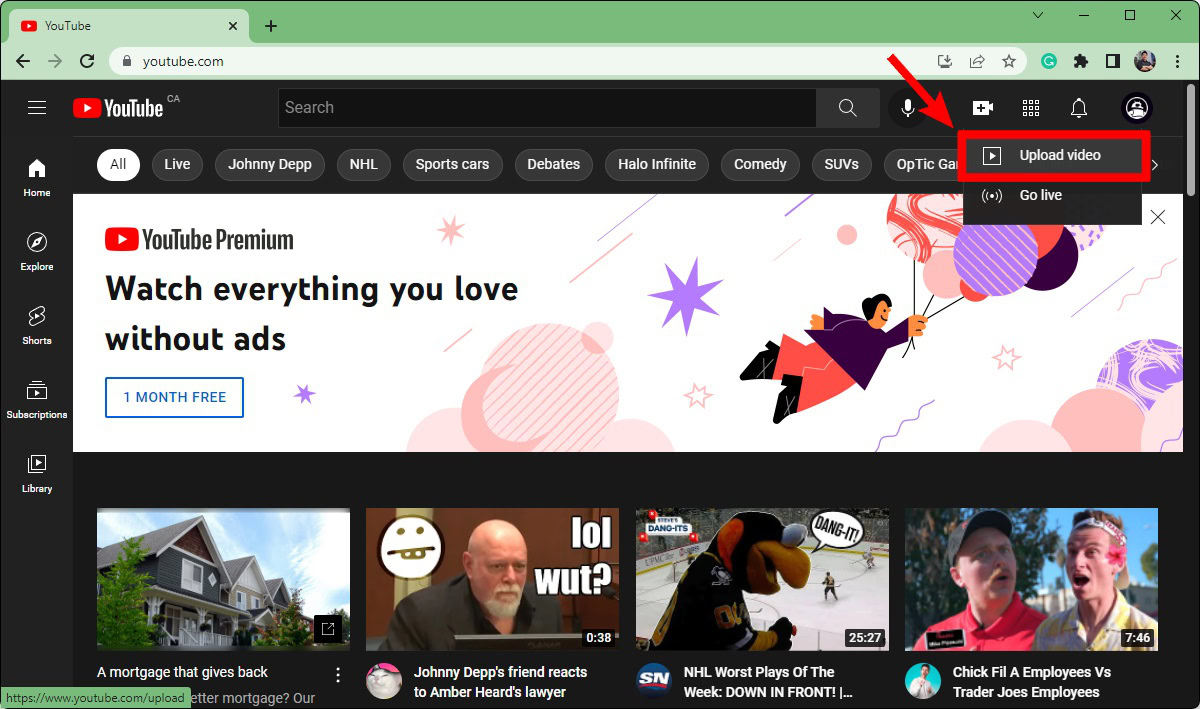
Click Upload video.
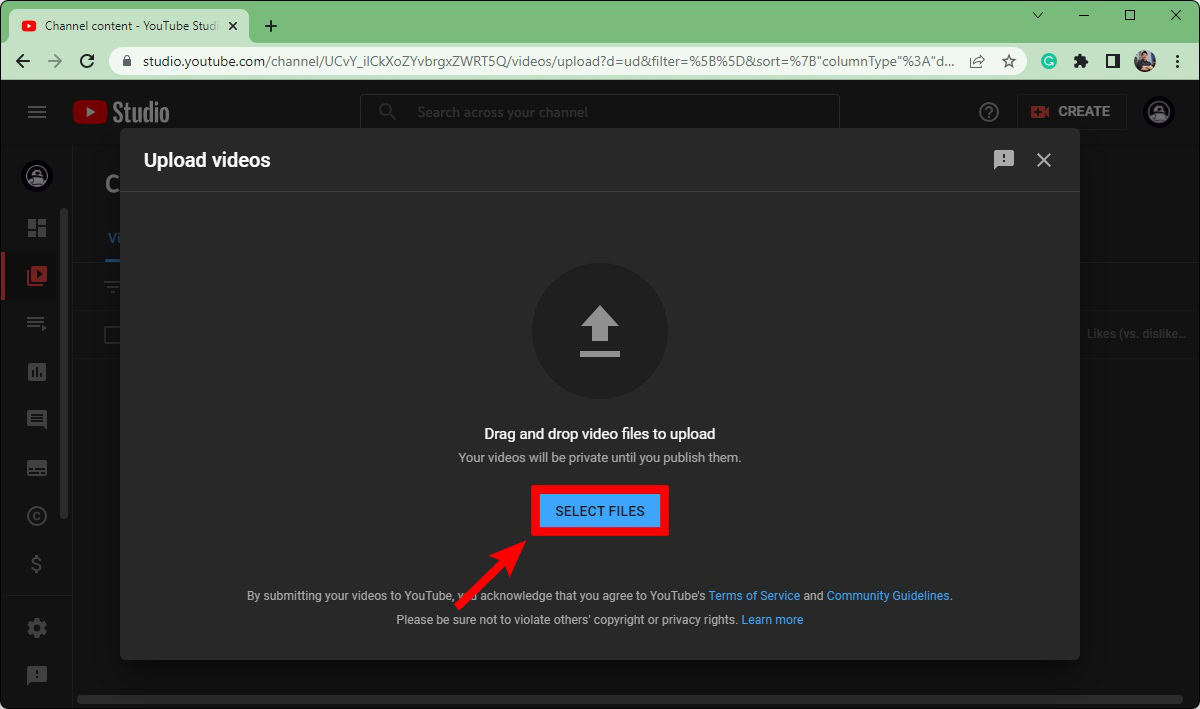
In the Upload videos box, click SELECT FILES. This will open your File Explorer; locate your video and open it to start the upload.
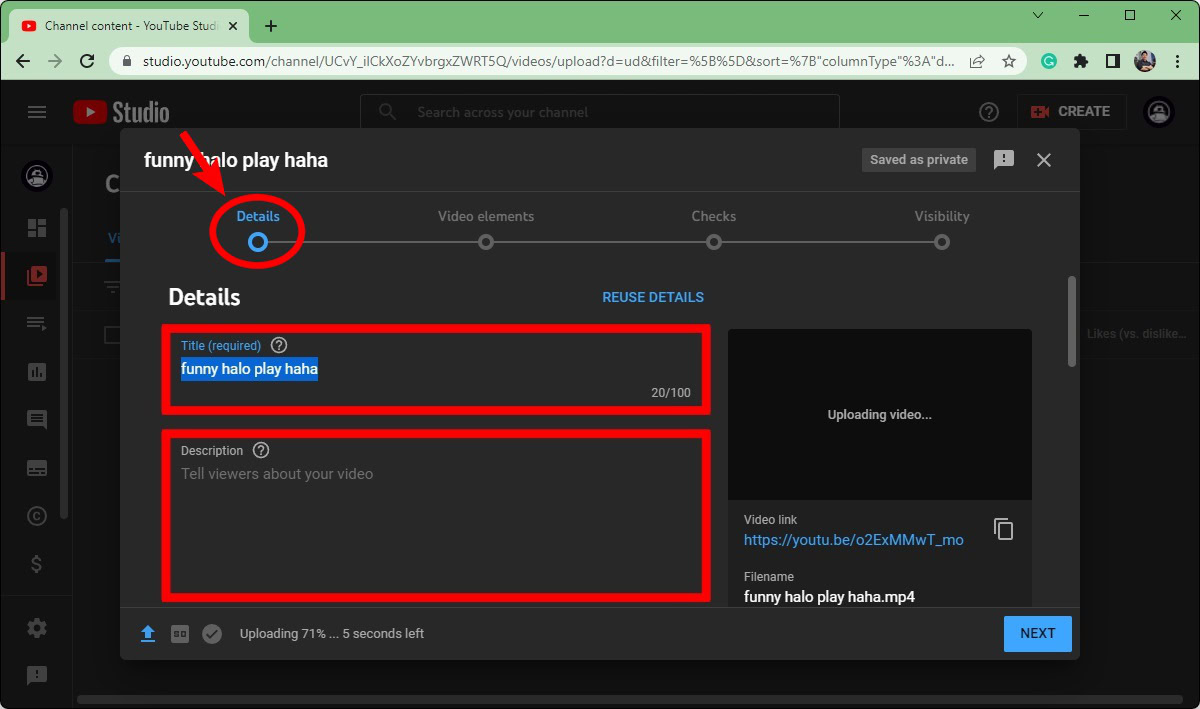
After your upload has begun, you must fill out the Details, Video elements, Checks, and Visibility for your video before publishing it. If you do all of these steps correctly, you can raise your video’s search engine optimization value and build viewership quickly.

Details
After selecting the file you want to upload to YouTube, the first thing you will be able to edit is the video’s Details. Give your video a name in the Title (required) field, then add a description in the Description field.
The description is the text that appears underneath your video. Video descriptions play an integral role in terms of search engine optimization. Additionally, if you have a longer video, you can break up your video into “chapters” by adding timestamps in the video’s description.
Scroll down. In the Thumbnail section, you can click the Upload thumbnail button to upload a custom thumbnail for your video. The optimal size for a YouTube thumbnail is 1280 x 720 pixels.
Under Playlists, click Select and then choose whichever playlists you want to add your new video to. Playlists are a great way to organize your channel page on YouTube.
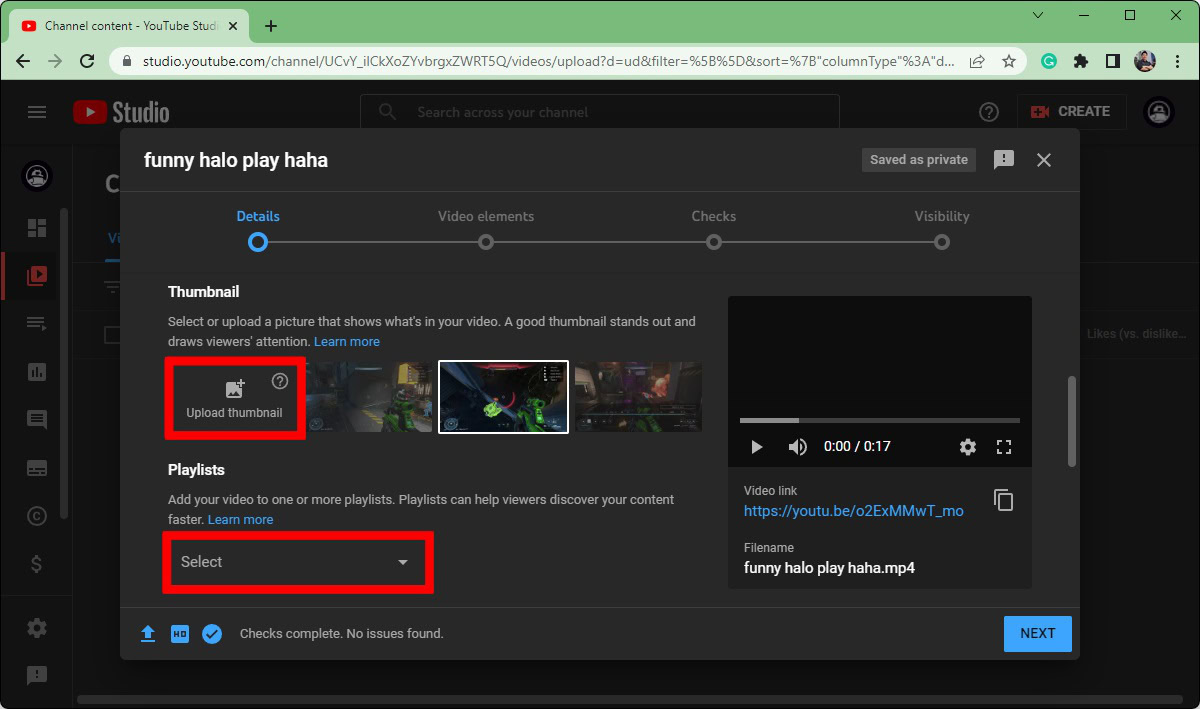
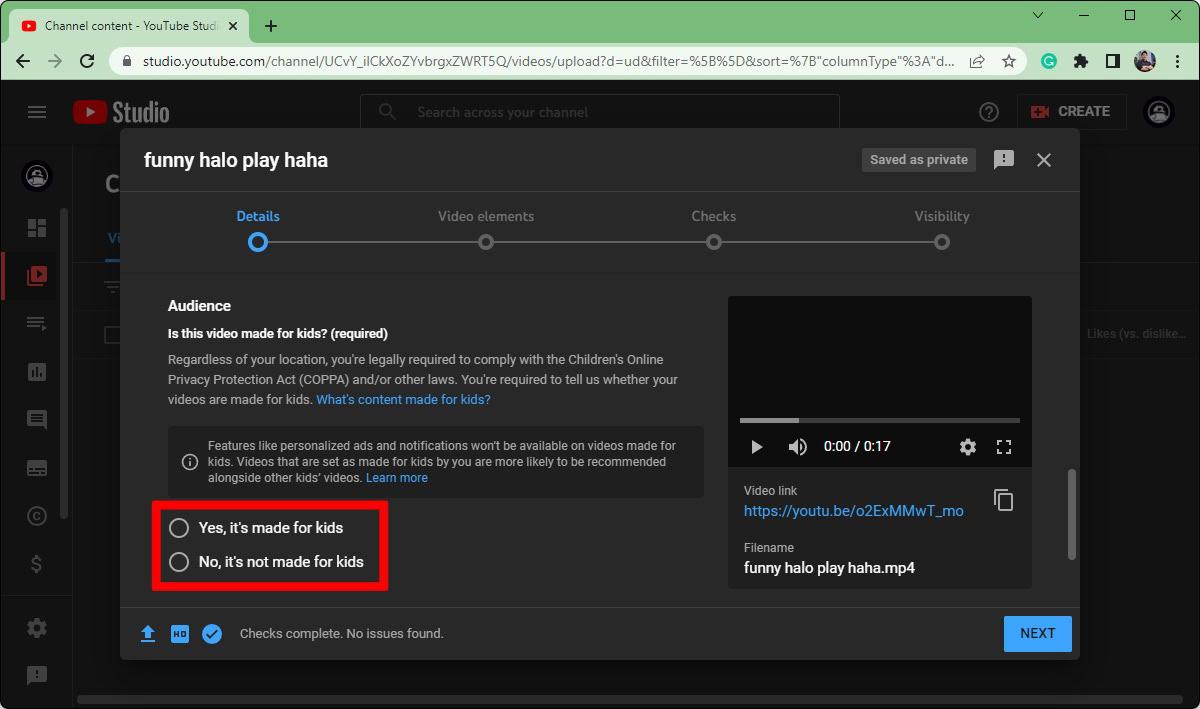
Scroll down to the bottom on Details. Under Audience, add the age parameters for your video.
- If the content of your video may not be suitable for all audiences, select No, it’s not made for kids.
- If the content of your video is for everyone, select Yes, it’s made for kids.
Video elements
When finished with the Details section of your video, click Next at the bottom to move on to Video elements.
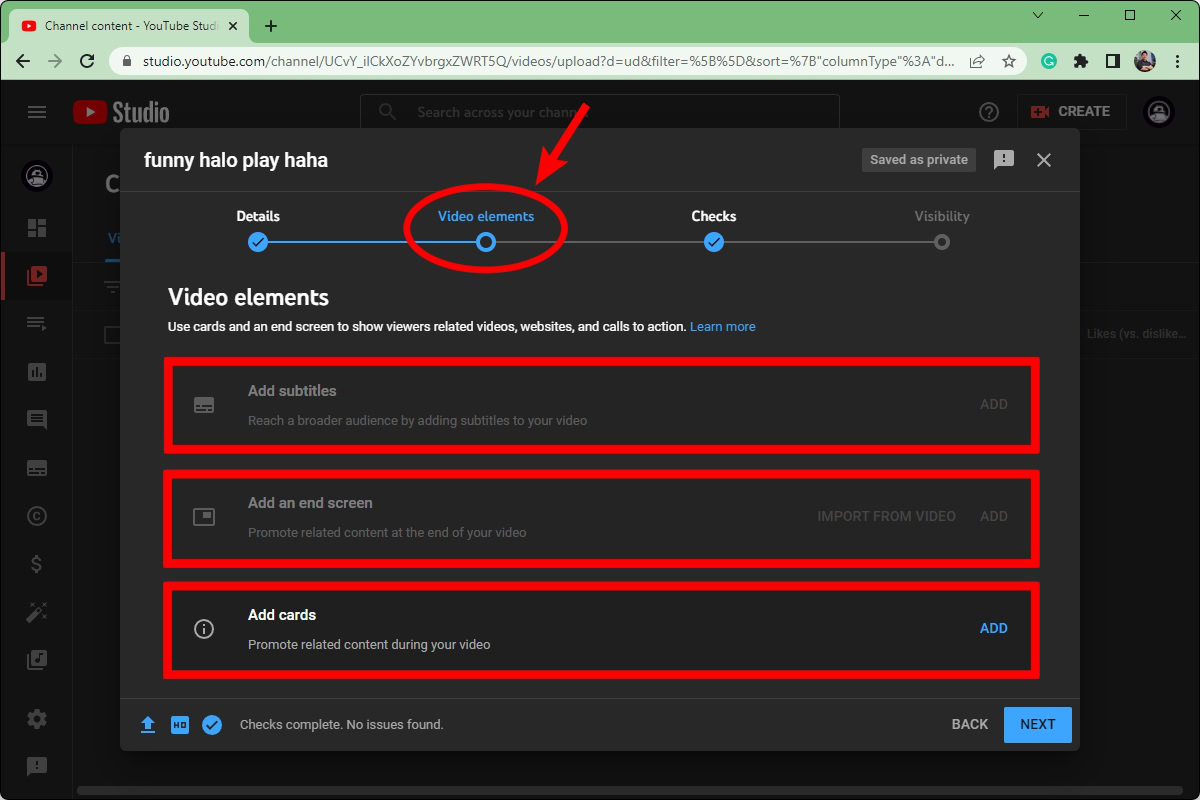
Here is where you can Add subtitles, Add an end screen, and Add cards.
Subtitles are pretty self-explanatory. This option adds text that correlates with whatever is said in the video.
An end screen is always a great idea to have for your videos, as people can see more of your videos or go to your channel using a menu at the end of your video.
Cards allow you to create little clickable notifications during the video. When people click on these, YouTube will redirect them to the video you linked. This is especially useful when you’re trying to demonstrate a point, and a different related video will help at a certain point of your video.
Checks
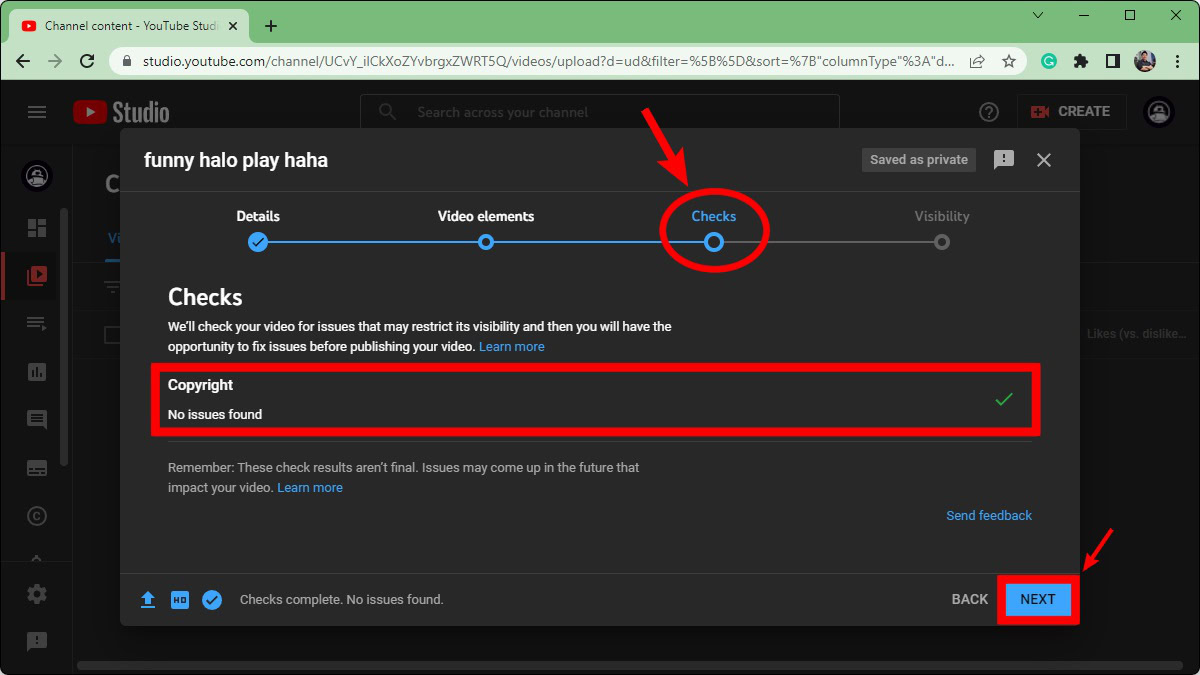
The Checks section is important because it tells you if you’ve overstepped your bounds. If you used content you didn’t create in your video, YouTube could take down your video over a Copyright Strike or a Copyright Claim.
There wasn’t always a “Checks” section, and people used to upload their videos without knowing if their video or their account was in danger.
Under Copyright, you will see whether your video contains content that could lead to copyright issues.
Click Next to continue to the final section.
Visibility
The final section, Visibility, is where you determine where the video is published.
- If you select Private, your video will not appear on your YouTube profile, and it won’t be searchable. For anyone other than yourself to be able to see the video, you must invite them. If a person is invited and has the video’s unique URL link, they can watch your video.
- Selecting Unlisted will make it so that the video doesn’t appear in search results or on your channel. Unlike Private videos, anyone with its unique URL link can see the video. They do not need an invitation.
- Public is what most content creators should select, as this will publish the video to YouTube. It will appear everywhere, including search results and your channel.
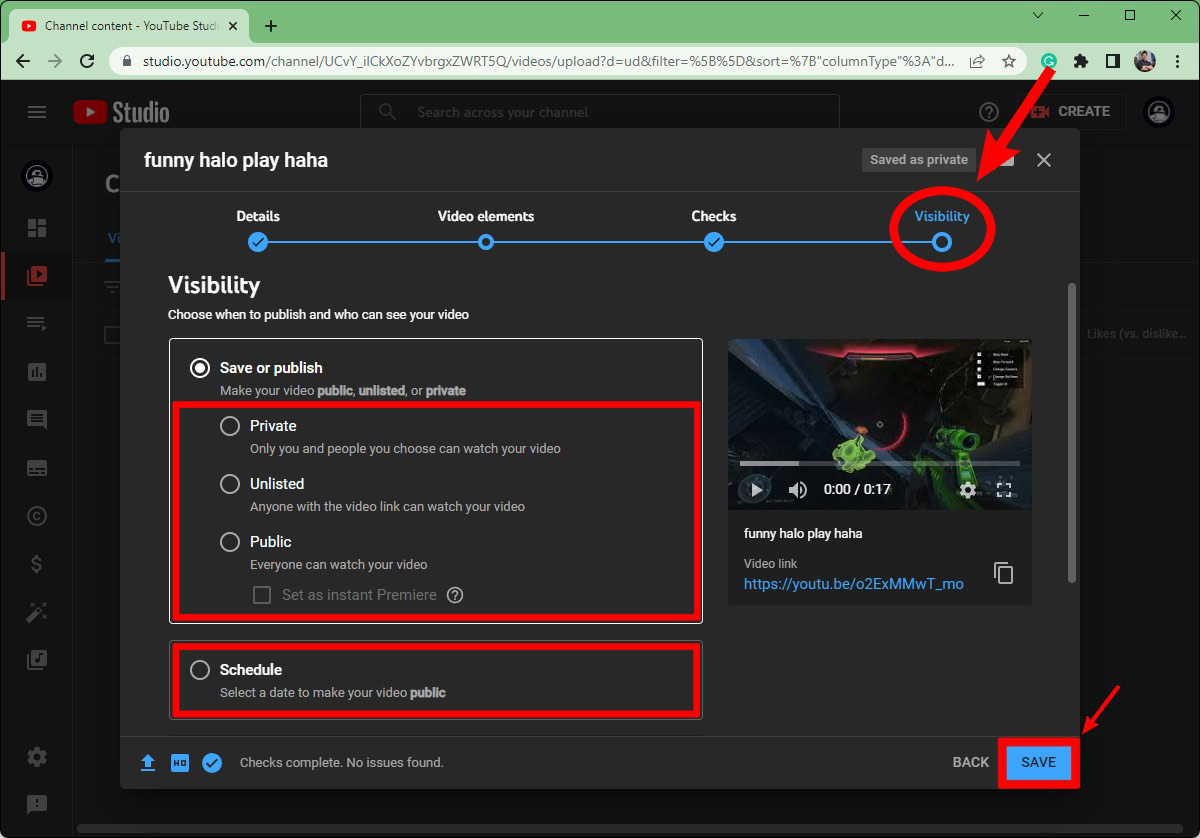
Click SAVE at the bottom of the box to finish publishing your video.
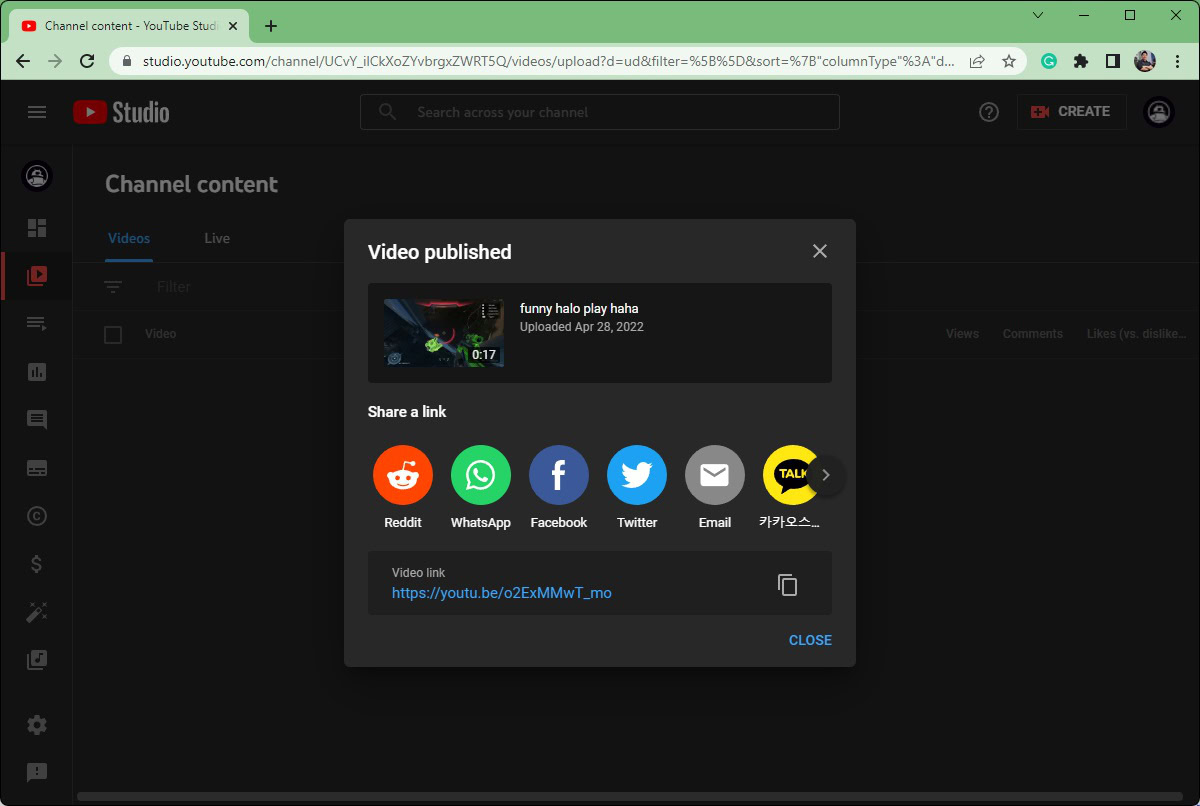
Uploading a video on the YouTube app (Android & iOS)
If you aren’t near your computer but still need to maintain your upload schedule, you need not worry. You can always upload videos directly from your mobile device.
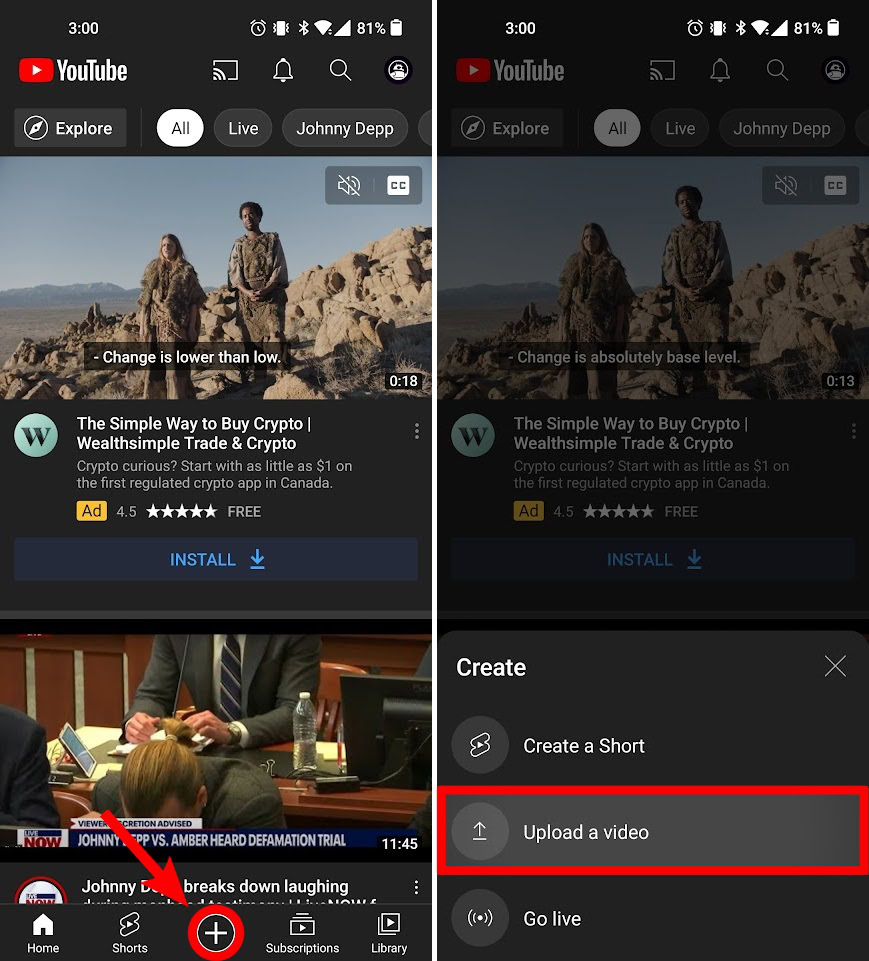
Open the YouTube app on your Android or iOS device. Tap the Create button that looks like a plus within a circle, then select Upload a video.
Give your video a title and description. You can also add Public, Private, or Unlisted as the visibility option, the location of the video, and what playlists you want to add the video to.
Tap NEXT when ready.

On the Select audience page, add the age parameters for your video. If the content of your video may not be suitable for all audiences, select No, it’s not made for kids. Select Yes, it’s made for kids if the content of your video is intended for all audiences. If your video contains adult content, you can restrict the video based on age.
Press UPLOAD VIDEO when ready.
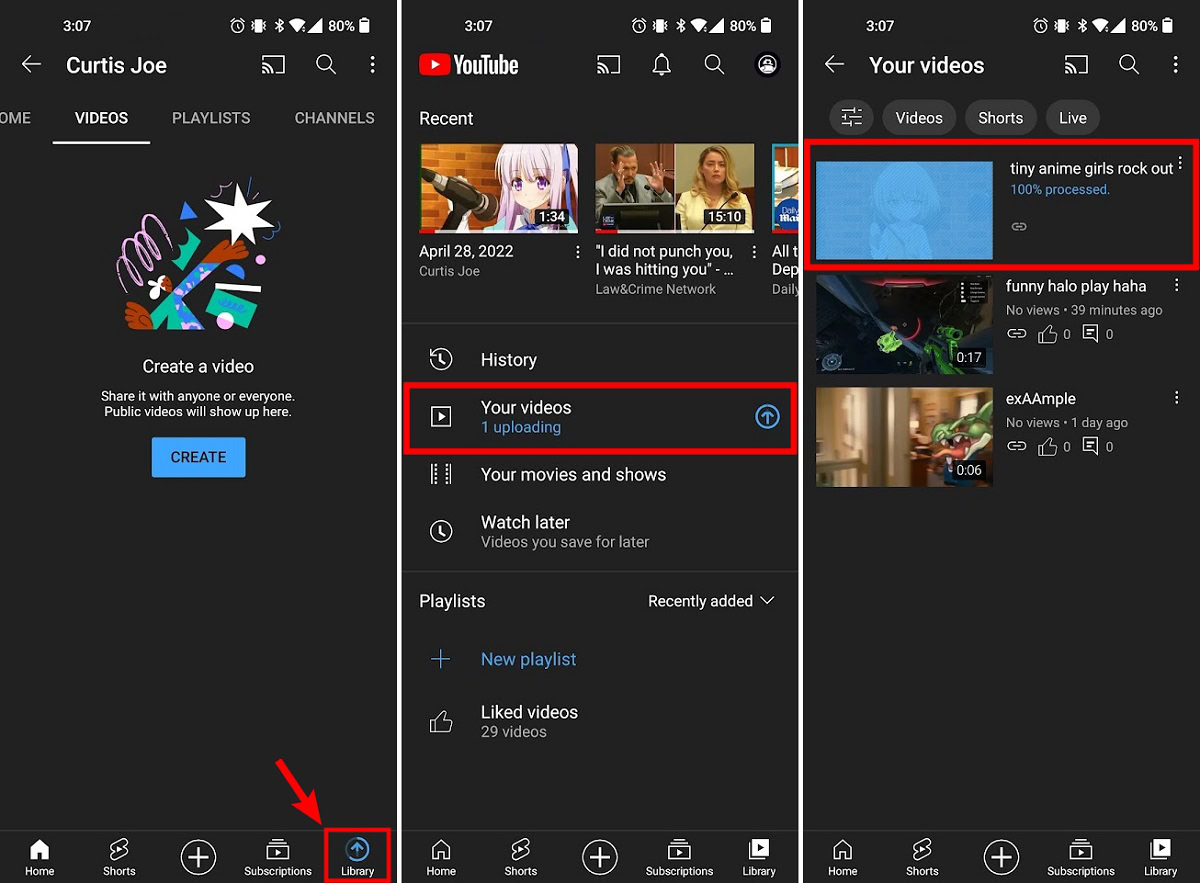
Your video will begin uploading. You can see your upload progress in the Library tab at the bottom. Tap Library, then go to Your videos to see your video once it’s finished uploading.
FAQs
Yes. If your original video file has no sound, but it is in an accepted file type (3GPP, AVI, FLV, MOV, MPEG4, MPEGPS, WebM, or WMV), you can upload your video.
You can also remove sound from videos you’ve already published in the YouTube Creator Studio.
If you have connected your Twitch account to your YouTube account and have VODs enabled, you can export videos from Twitch to YouTube. You don’t even need to download them first; you can upload them directly from Twitch.
You can share videos from YouTube to Facebook by copying the URL and pasting it into your Facebook post, or you can click Share on your YouTube video.
You can also upload the video directly if you have the original video file.