Affiliate links on Android Authority may earn us a commission. Learn more.
Android customization - autumn inspired 'animated' widget, moving elements based on variables in Zooper Widget
November 6, 2014
Did you follow along our Android customization series last week? If you did, you got to walk through building your very own completely custom notification counter for any app right on your Homescreen. This week, as promised, we will look at moving objects around a Zooper Widget based on variables and system settings.
The goal today is to help you disguise things, like your battery level or the outside temperature, behind graphical elements. We will work off of my autumn widget with the falling leaves. I will show you how to move one leaf, you’ll get to apply your new skills to handle the rest.

Before we get started

To give you an idea what we are looking at here, I am working from the circular widget that I walked you through in our full Zooper Widget beginner’s guide. You do not need to do all of this work, but you will need to know what the Bitmap element is and how to work some of the basics.
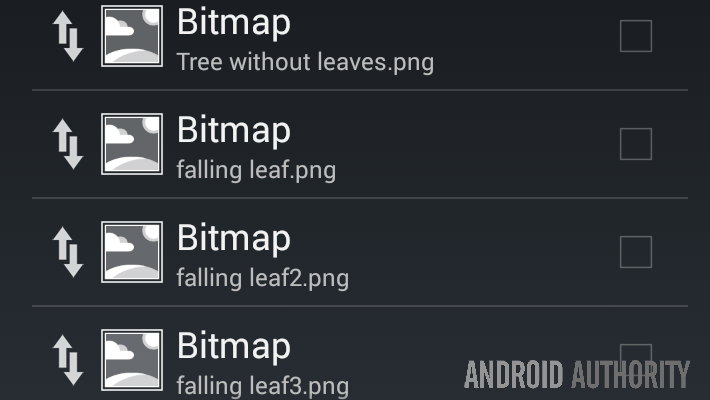
To get started, you’ll want to create your Zooper Widget on your Homescreen and include your image as a Bitmap element. Be sure to size it as needed and then position it in your starting position for your movement. As you’ve seen, I have my tree as a background image, then I’ve positioned my leaves to sit at the top of the element.

As you have seen before, there are many variables built into Zooper Widget that you can work off of. Of course, you can also pull in info from Tasker, but we’ll not address that again today.
With your bitmap element in place, take note of the starting position X Offset and Y Offset position.
Move your bitmap element to your finish position and again take note of the X Offset and Y Offset position.
Now for the tough part, math!
For the falling leaf, the start and stop positions have the same X Offset value. Since only the Y Offset value changes, the leaf moves completely vertical. As you also noticed, I chose to link the position to my battery level, where 100% battery puts the leaf at the top and 0% battery brings the leaf all the way to the bottom.
Now, each movement, in each direction, for each element will require different math to make things work properly. If you are working with the battery level, or anything else that scales 0 to 100, it would be pretty convenient if your Y Offset movement was also 100. When I first built this widget, I lucked out in this manner, the Y Offset of my leaf needed to travel 200 points, from 0 to 200. So, for every battery percentage tick, the bitmap element had to move two points.
In terms of the math, moving 200 points looked something like this: (100 – battery level) * 2. (So, when the battery level is at 100%, the Y Offset is at 0. Battery at 0%, Y Offset at 200, and when battery at 50%, the Y Offset made it to 100.)
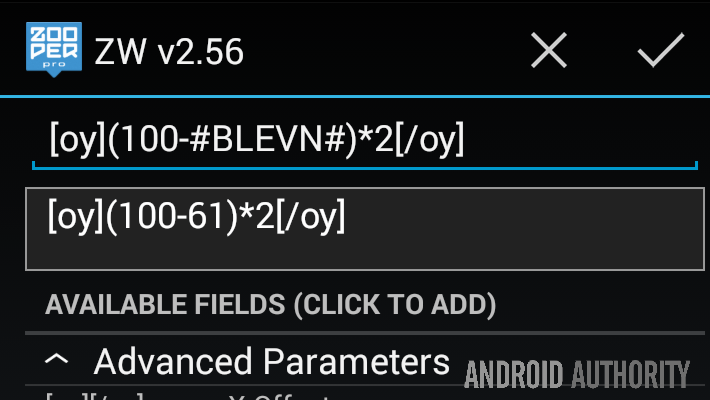
Once you get your math figured out, feed it into the Advanced Parameters section of your element. You’ll need to tie it to the appropriate X Offset and/or Y Offset parameters. If you are copying my project word for word today, your code will look like this:
[oy](100-#BLEVN#)*2[/oy]

Tap that checkmark to save your work, then hit the system Back button to save and close out of the widget.
Go check it out. How is it working for you? If it is not exactly what you were looking for, do not be disheartened. It may take a bit of tweaking to get your moving widget to perform as desired. For example, the code above will bring the Y Offset value to 200 when battery level hits 0%, but if you’ve ever let your device get low on juice, you know that 0% is nearly impossible to achieve, which means you will never see your element at the Y Offset value of 200.
What’s next
Since completion of the steps above, I have added two changes to my falling leaf. First, I have modified its positions and rate of fall, second, I have added a little twist, literally.
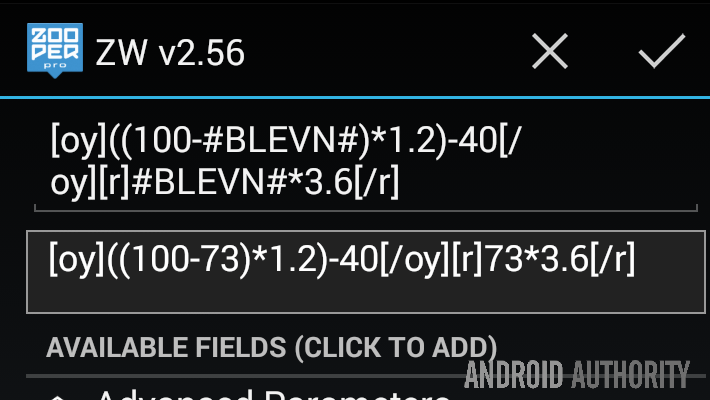
To achieve the leaf fall positions you see in the opening animation to this article, I changed the leaf so that it no longer starts at the very top, it no longer goes all the way to the bottom (Y Offset 200) and instead of moving at a pace of 2 points per battery percent, it now moves a little slower. You’ll see that the new Advanced Parameter code is not mathematically optimized, but it is strictly based off of above code, just to keep it understandable. As follows:
[oy]((100-#BLEVN#)*1.2)-40[/oy]
The results are pretty straightforward, the leaf sits at Y Offset value -40 when the battery is full and would drop to 80 if the battery dropped to 0%.
The Twist. I do really mean that literally, the leaf now spins as it drops down. It is a little thing, and perhaps not that attractive if you look at it too closely, so we won’t – here is the code:
[r]#BLEVN#*3.6[/r]
Now, for the biggest piece of knowledge you should take away from this article, you can insert more than one code block in a single element’s Advanced Parameters section. As in the image below, just go ahead and type out your new code block right at the end of the first, no space or separators required. Just try not to send multiple commands to the same parameter, if you can avoid it.

Next week
Next week on our Android customization series, we’d like to take a look at a physical productivity tool, we will show you how to connect a USB flash drive to your typical Android device. As I sit here in a hotel room, relegated to their non-protected open WiFi, I realize that it is just not smart to use my typical WiFi file transfer tool, so instead, well, I’ll show you what I did next week.
While it is quite difficult to make a one size fits all dynamic Zooper Widget like this one, how did you find the process? Have you created a masterpiece worth showing off?
Thank you for being part of our community. Read our Comment Policy before posting.